WARNING: This product contains nicotine. Nicotine is an addictive chemical.
NEWSLETTER
Get special offers and find out what's new in the store. Sign up for the EV newsletter.WARNING: This product contains nicotine. Nicotine is an addictive chemical.
NEWSLETTER
Get special offers and find out what's new in the store. Sign up for the EV newsletter.So you want to enter the world of rebuilding? Well, this guide will help you get started. Before you get into the world of rebuilding, let's talk about the why. Rebuilding has lots of pros to it with the real downside involving a learning curve (AKA Time). Some upsides consist of improved performance and flavors of vape juice, better quality control of the atomizer, more customization availability, and cost-saving. Most of the cost is up-front, such as a rebuildable dripping atomizer (RDA) or rebuildable dripping tank (RTA) and necessary tools. After that, the only recurring cost is cotton and wires.
In the world of rebuilding, you would also have total control over the materials and quality of coil configurations as long as building is done correctly. As well as outperforming pre-made coils, a well-built rebuildable will never have to deal with leaks or bad coils. As far as downsides go, they don't go very far when it comes to rebuildables. Aside from time spent, the hardest part of rebuildables is the learning curve - but thankfully, you’re here. Another facet of rebuilding that can be a downfall would be convenience, unlike pre-made coil heads that can be utilized in a plug ‘n’ play manner, the rebuildable coils take time, wire, cotton, and tools to assemble and prepare before usage. Expect to spend around 5-10 minutes building your atomizer, instead of the pre-made coil change process that usually takes seconds. One could even carry an additional pre-made coil around just in case, whereas carrying an entire build kit and materials is not very convenient. Lastly, the upfront cost associated with rebuilding is not exactly cheaper. Buying the materials and tools can cost quite a bit, however, instead of spending a few bucks every week on a coil, the initial cost is just a small hurdle on the road to amazing savings with accessories at your local brick and mortars or online vape website such as Element Vape!
When shopping for a rebuildable atomizer, the first thing to do is decide what type you want. Let’s go over the main types of rebuildable atomizers:
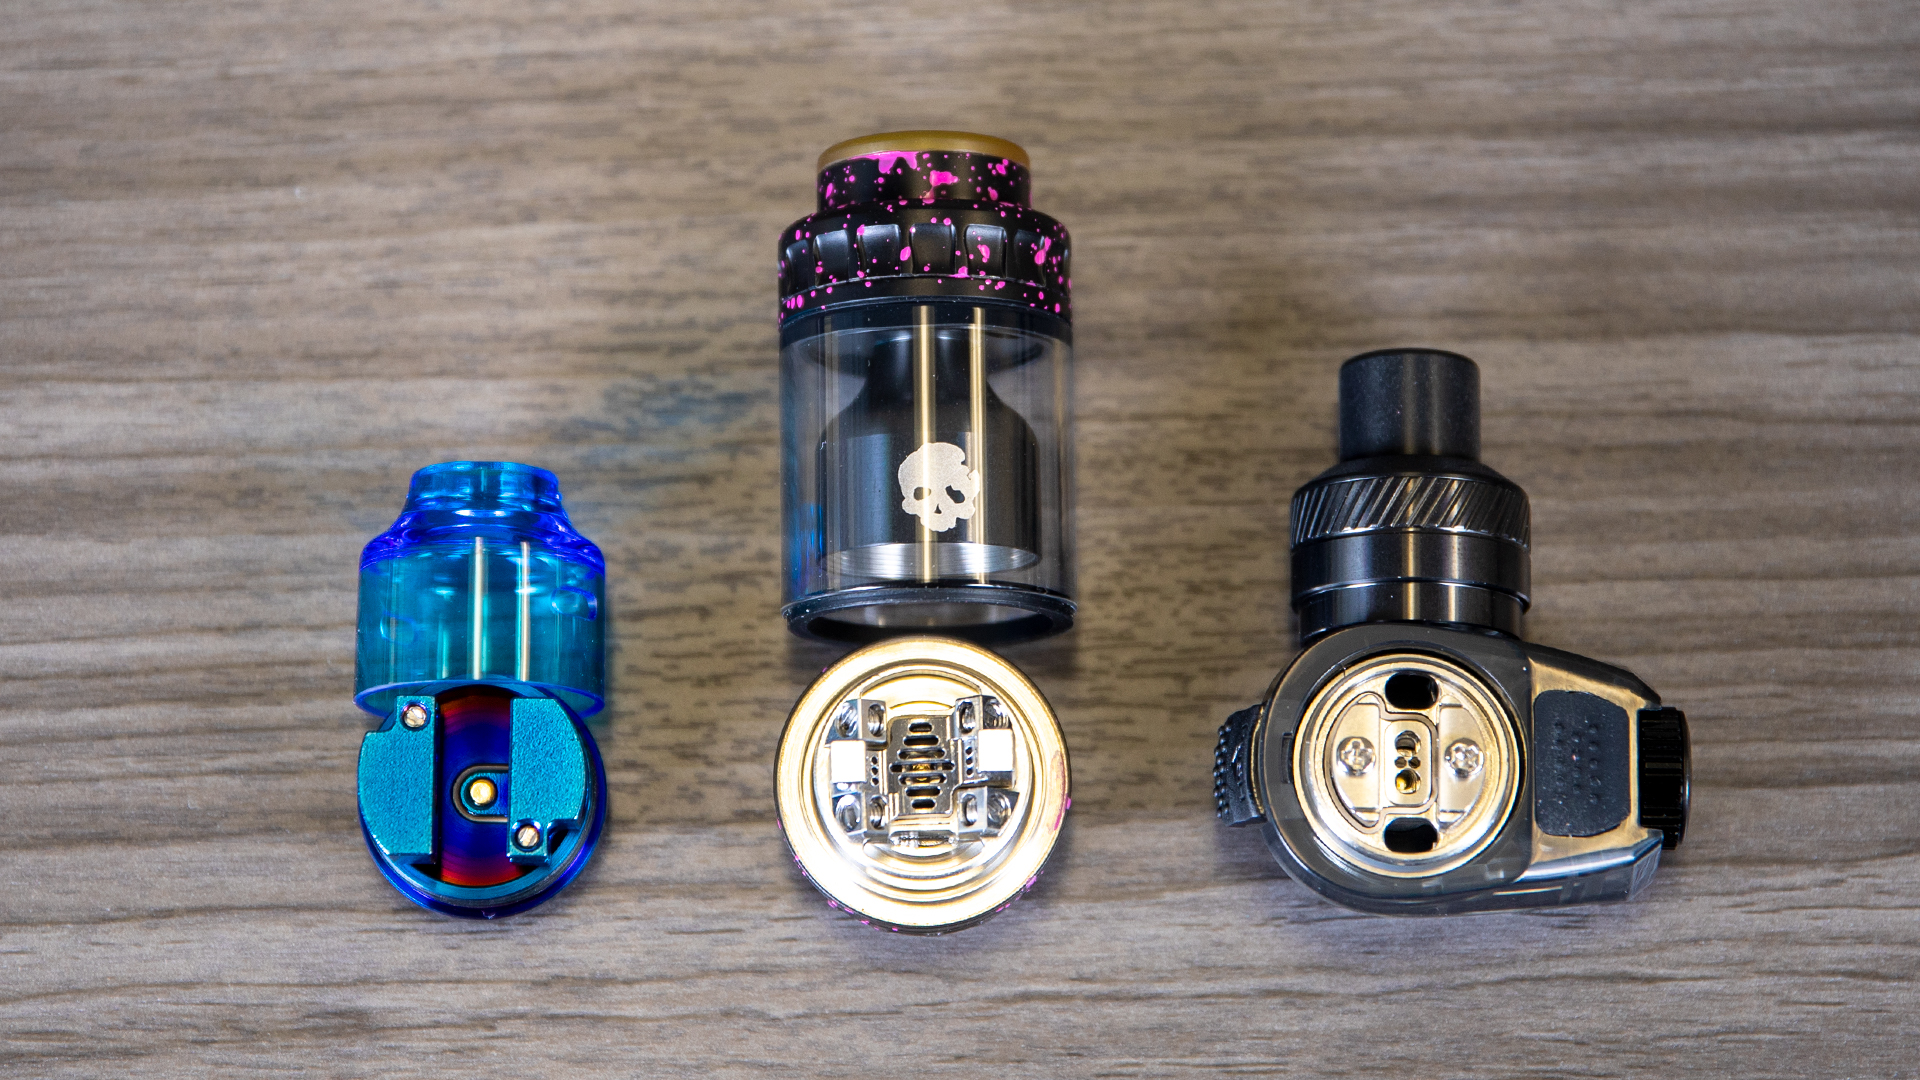
RDA - Rebuildable Dripper Atomizer
RDA’s are the most basic of them all. Comprised of a build deck and top cap, with no reservoir, they get their name from the constant need to drip eJuice onto the cotton wicks in between uses. This was a fairly inconvenient method leading to a lack of better options, however, with the advent of squonking, there has been a strong resurgence as of late.. Most RDA are made with a squonk or “BF” 510 pin which has a hollow passthrough allowing eJuice to be pumped up and through it. When complemented by a squonking box mod, which is a mod with a built-in reservoir, one can simply squeeze the internal bottle to moisten the cotton wicks with fresh eJuice to the squonk RDA.
RTA - Rebuildable Tank Atomizer
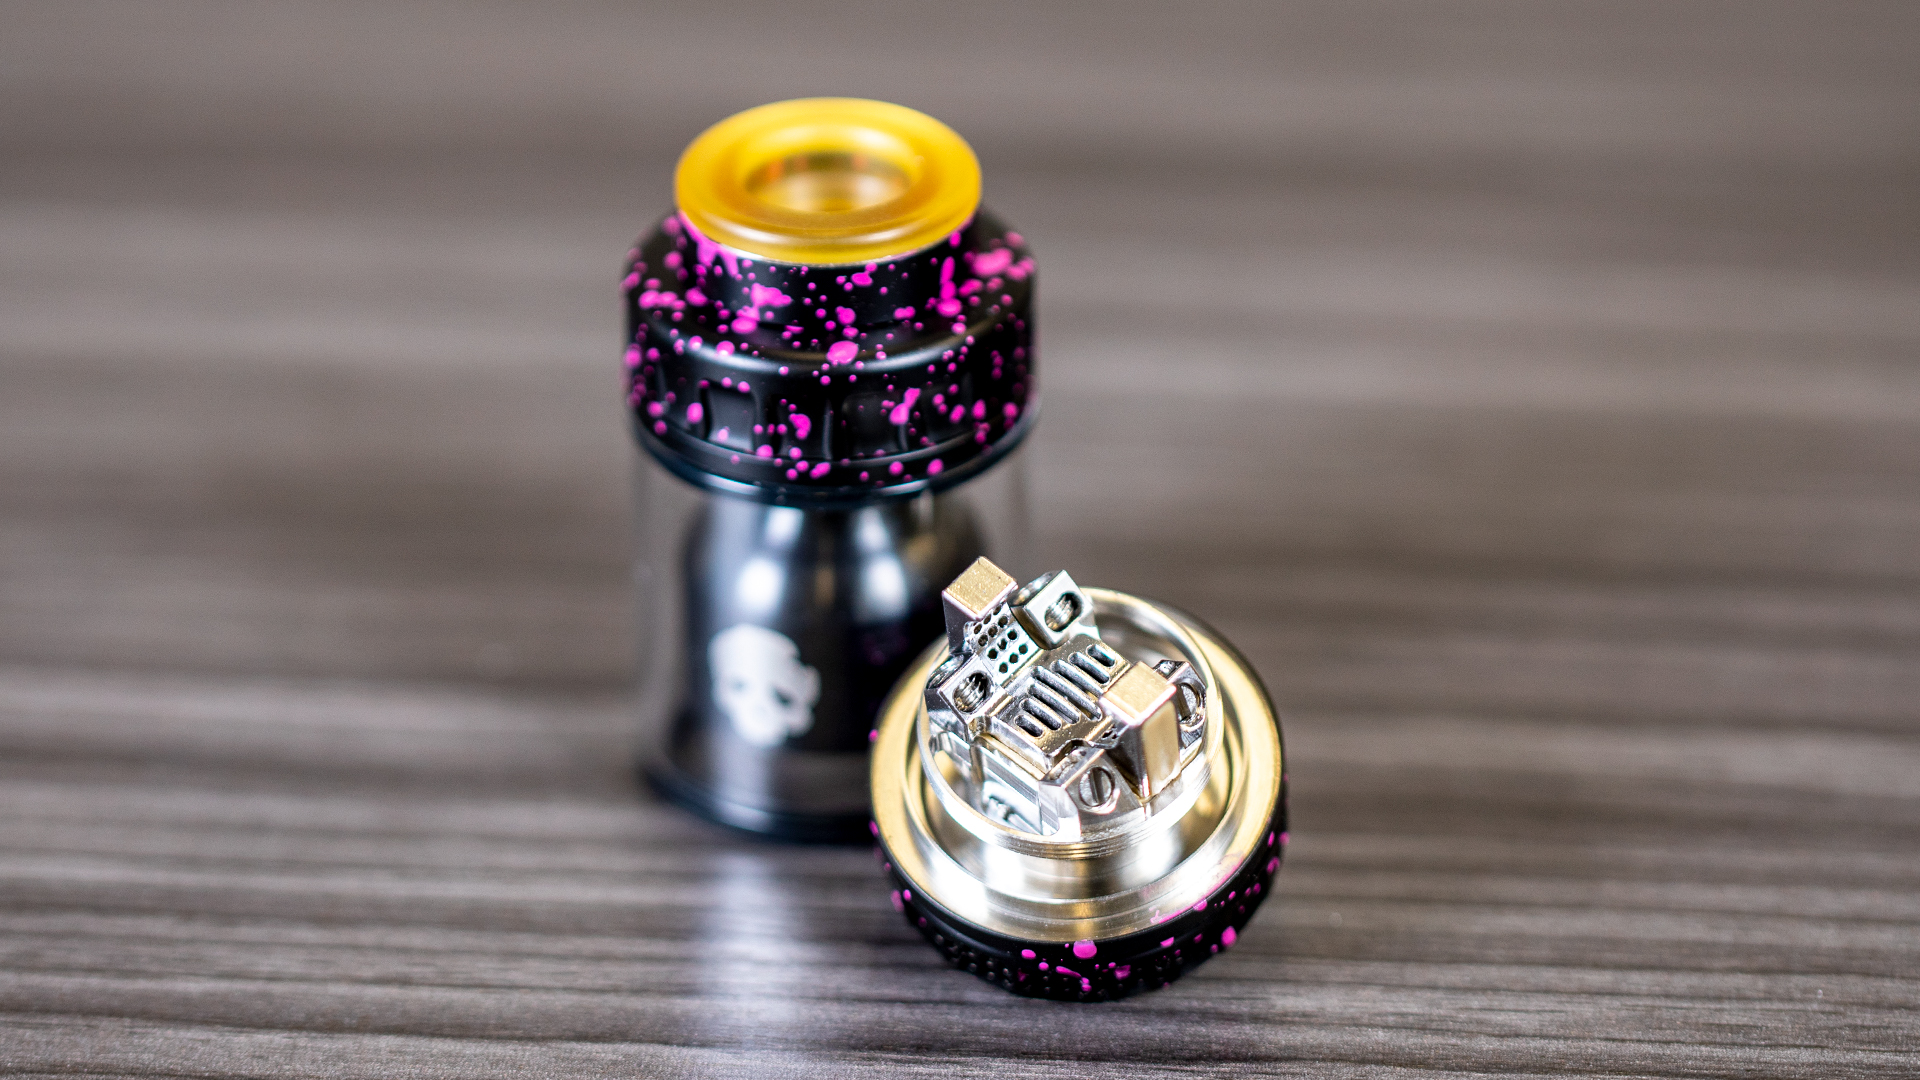
RTA’s have had great popularity for quite some time and still reign supreme. An RTA is a rebuildable atomizer with the build deck situated inside the tank. They are a tried and true atomizer design in the rebuilding world. They do not require special mods to use and have an integrated reservoir that are still being designed and improved on to this day. While on the smaller end of the spectrum, capacity hovers around 2mL, but some larger capacity options can hold up to 30mL of eJuice, averaging around 5-8mLs. RTA’s are all different from one another and will definitely take some practice to wick correctly. If not done correctly it can lead to vaporlock, a cotton malfunction where it cannot absorb eJuice at an ideal rate, or it may potentially leak. Proper wicking takes practice, but there are plenty of educational sources to find the method that best suits you. Check out the Pink Splatter DOVPO BLOTTO RTA in the picture below.
RBA - Rebuildable Atomizer
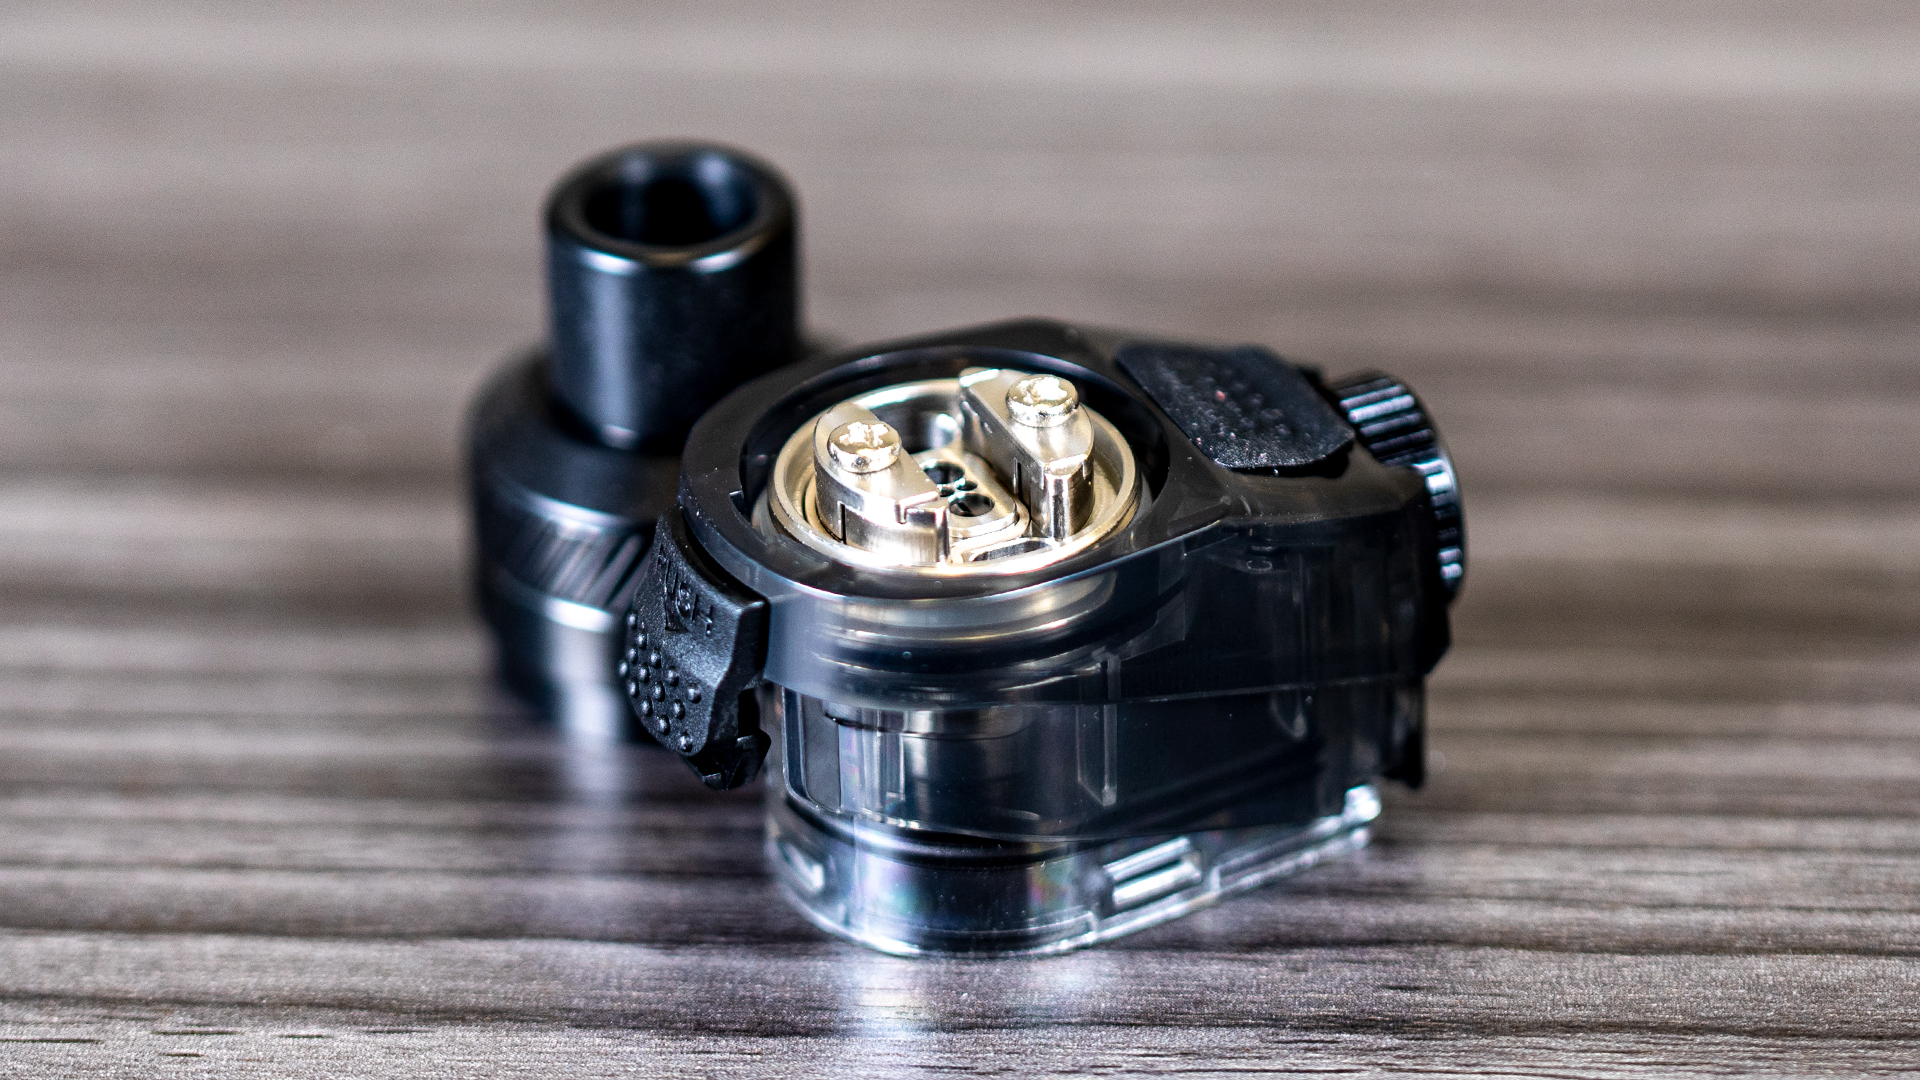
In an ideal world where vapers used correct terms for everything, this would be a general term to describe any rebuildable atomizer. However, in today’s world of vaping, RBA is usually used to describe a rebuildable coil atomizer head, which can be used in a sub-ohm tank for premade coils to replace the premade coil. Not every tank offers this, and they are generally an item that is sold separately. In addition, they rarely perform as well as a traditional atomizer geared for rebuilding but it is a great way to get familiar with rebuilding if you already own the tank. With the emergence of Pod Mods, even some pod system such as the Geek Vape Aegis Boost 40W has an RBA edition. See the Aegis Boost RBA in the picture below.
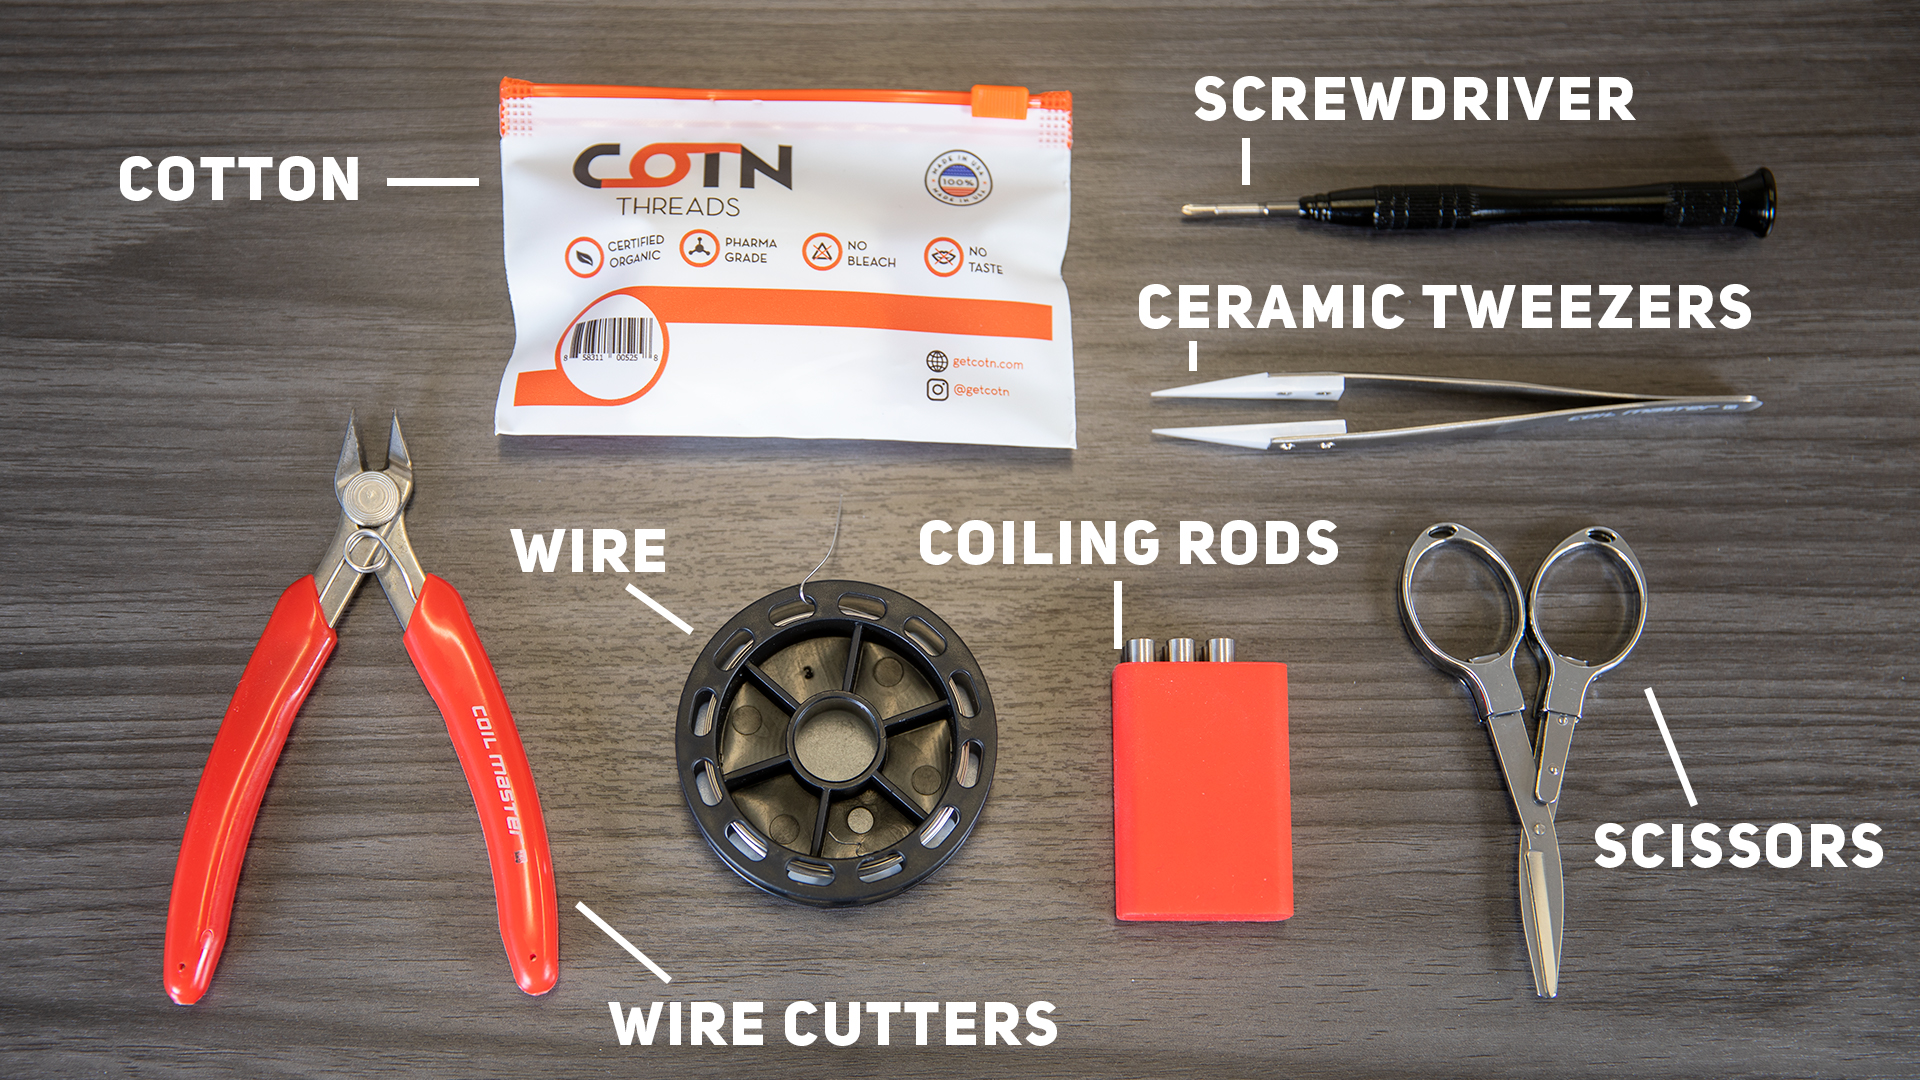
Remember how I said earlier the upfront cost was more? Let me list out all the things you should have and why. Not all are required, but they are a great idea to have to improve the quality and consistency of your builds should you go the route of rebuilding.
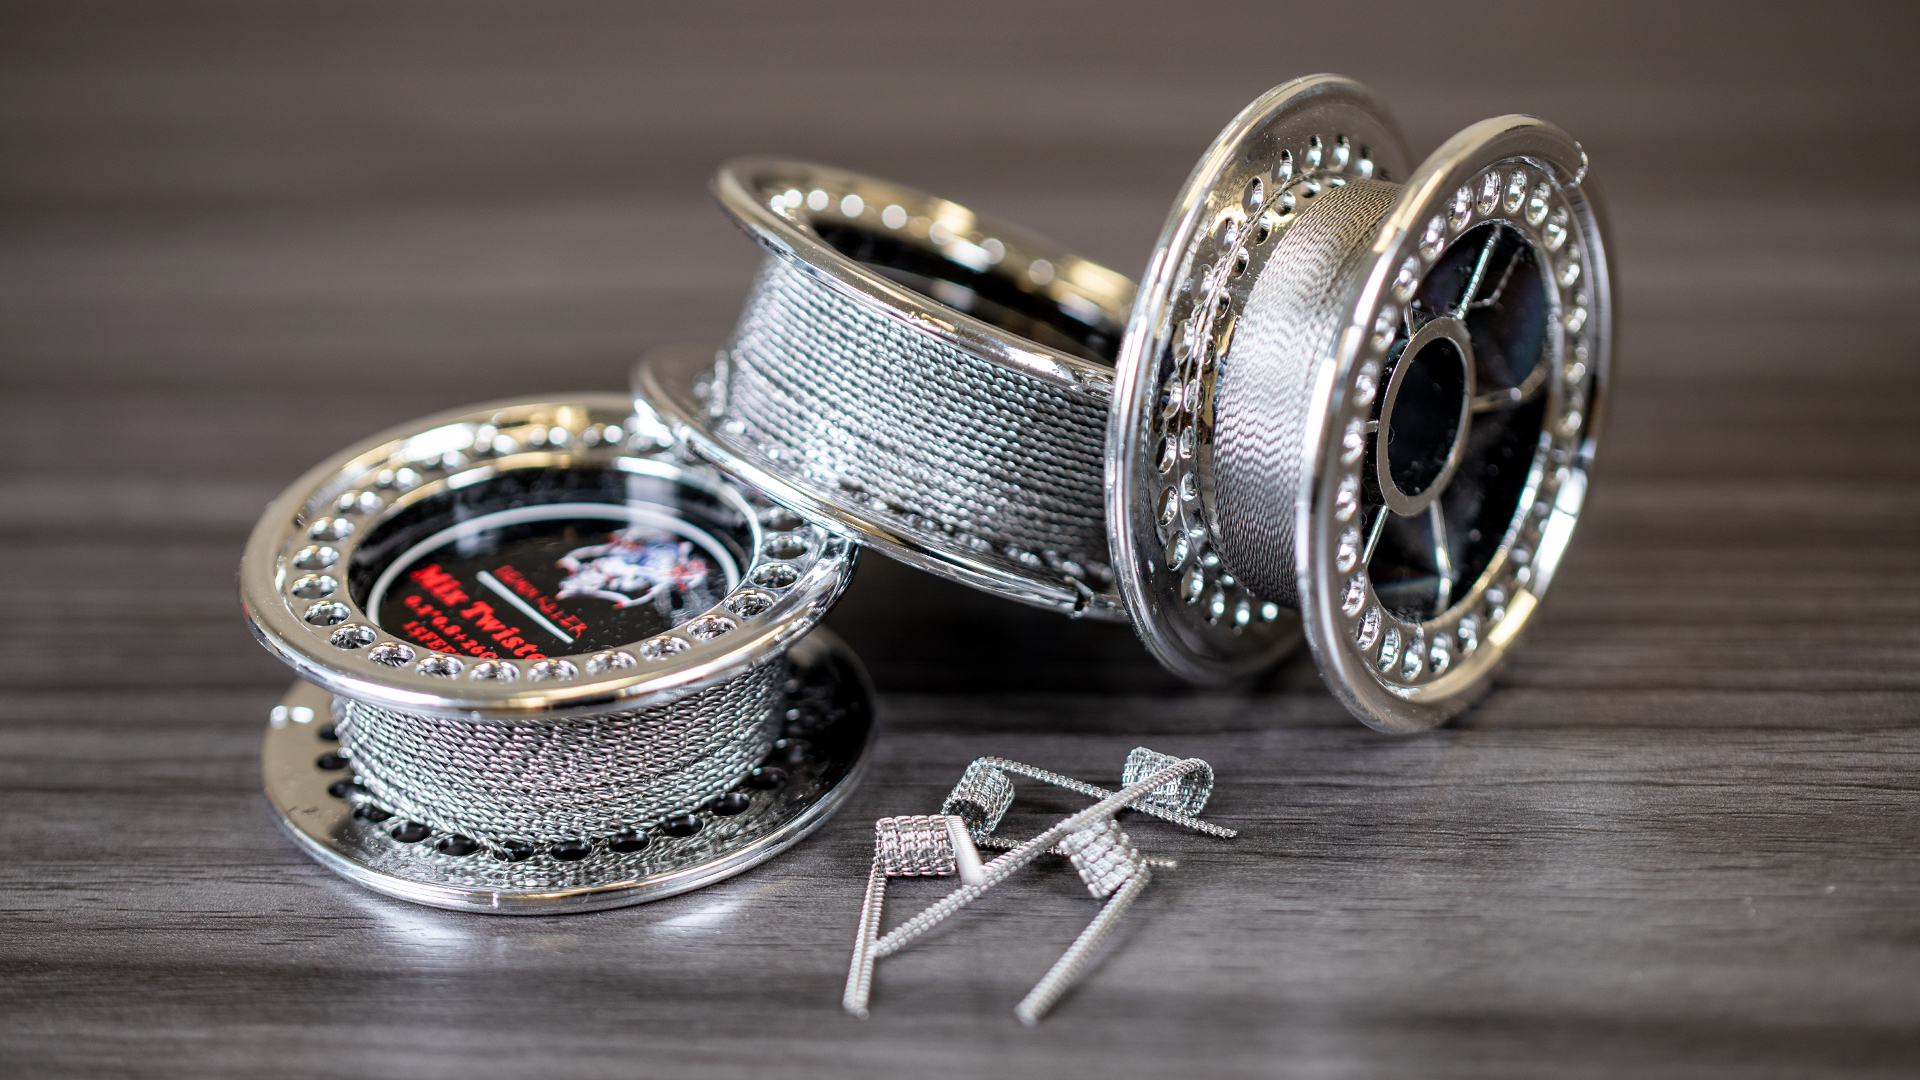
Vape Wires - Probably the most obvious requirement of all. With tons of wire options to choose from, it can become confusing, but to keep it simple, start out by buying a small spool of regular round wire. The main choices for metal types are kanthal, nichrome (Ni80), or stainless steel (SS316 or SS316L). Kanthal is the reliable workhorse of the bunch, however, some users do report a slight metallic taste. Nichrome and stainless steel cannot be used if the vaper suffers from a nickel allergy, which makes Kanthal the go-to choice for them. Nickel allergies aside, Ni80 wires are a solid choice for power modes, while Stainless Steel performs exceptionally with temperature control capable box mods. As for the gauge, start with a small roll of 24-26ga wire, in case that wire size isn’t your preferred size. It can always be used for fancier advanced coil configurations later on, but for now, let's get started with the basics.
Cotton - With tons of options to choose from like organic cotton pads, Cotton Bacon, Native Wicks, Coil Master Pro Cotton, and COTN Threads, making a selection can be difficult. To make it easier, just select a random vape cotton and move on as they all have their differences but perform essentially the same.
Wire Cutters - These are definitely needed, Some vapers may already have a pair as its a basic tool. A smaller pair of angled wire cutters is ideal for vaping as they are used to navigate the build deck to snip off leads of installed coils or sectioning off wire from the spool.
Ceramic Tweezers - While not absolutely necessary to have, they help remove hotspots and form coils keeping them nice and even. Some variants may even have a section to help grip a stuck atomizer without damaging anything.
Coil Jig - This is something that you may want for sure, though its not 100% necessary. Forming coils with a drill bit isn’t impossible, but rebuilding is a lot easier with the myriad of size options that are present in a coil jig kit.
Screwdrivers - Not entirely necessary since many rebuildables come with the necessary tools to install prebuilt coils, but the included ones are often painfully small and cheap, making it a lot harder to use. Buying a decent screwdriver set can go a long way. Just be sure to get a Phillips Head, Flat head, and Hex head in various sizes.
Scissors - Most people generally have a pair of scissors already. Ensure the pair is sharp and clean for cutting cotton. No one wants dirty cotton and dull scissors can create quite a hassle when trimming cotton.
Angled Tweezers - This one isn’t needed at all, but does make rebuilding a lot easier. Perfect for fluffing out the cotton wicks and placing them into the right spot without compacting and stuffing them.
Ohm Meter - Buying an ohm reader isn’t necessary as many regulated mods can detect and display the resistance and ohms. A meter definitely helps make life easy. Built low to prevent tipping over, the ohm meter can read the resistance of your assembled coils, and some can even fire the build to help identify hotspots. This can also help determine a defective mod as a large difference in ohms readings between the meter and the mod could indicate an issue with either device.
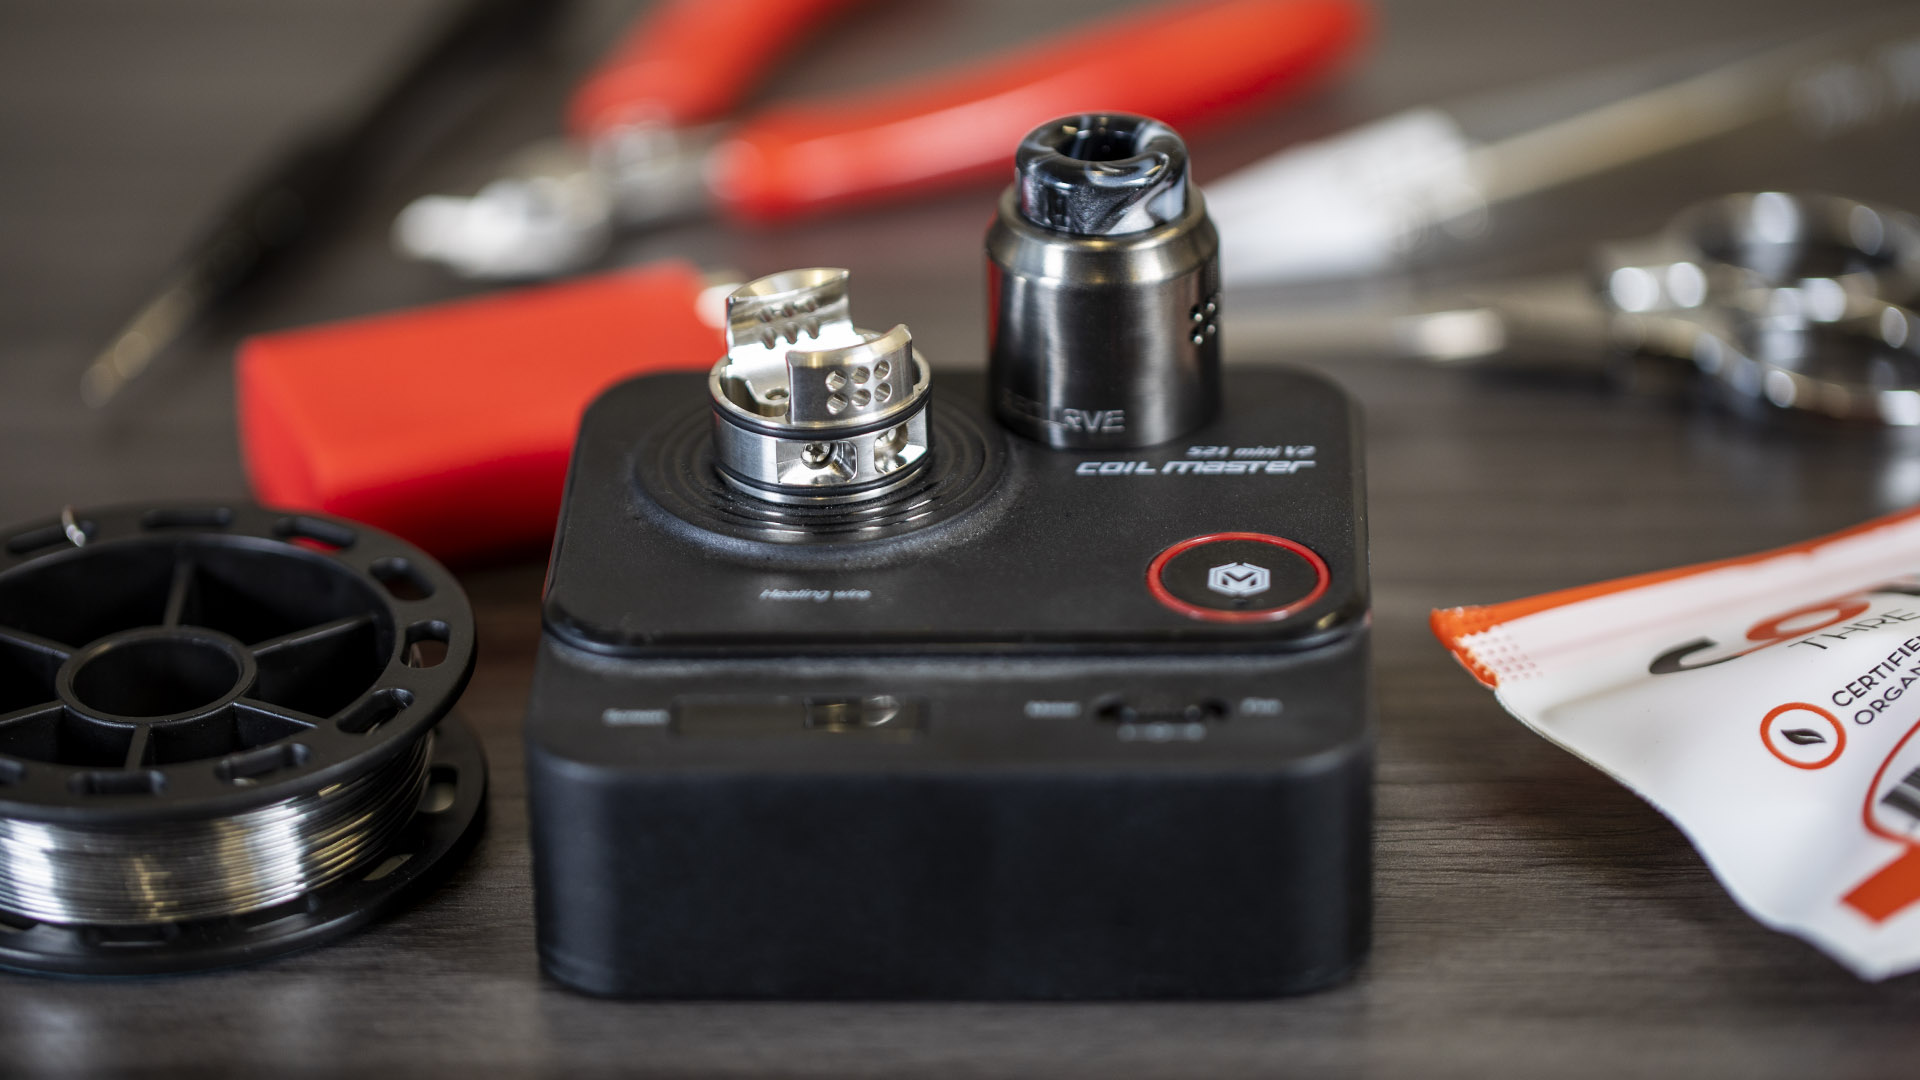
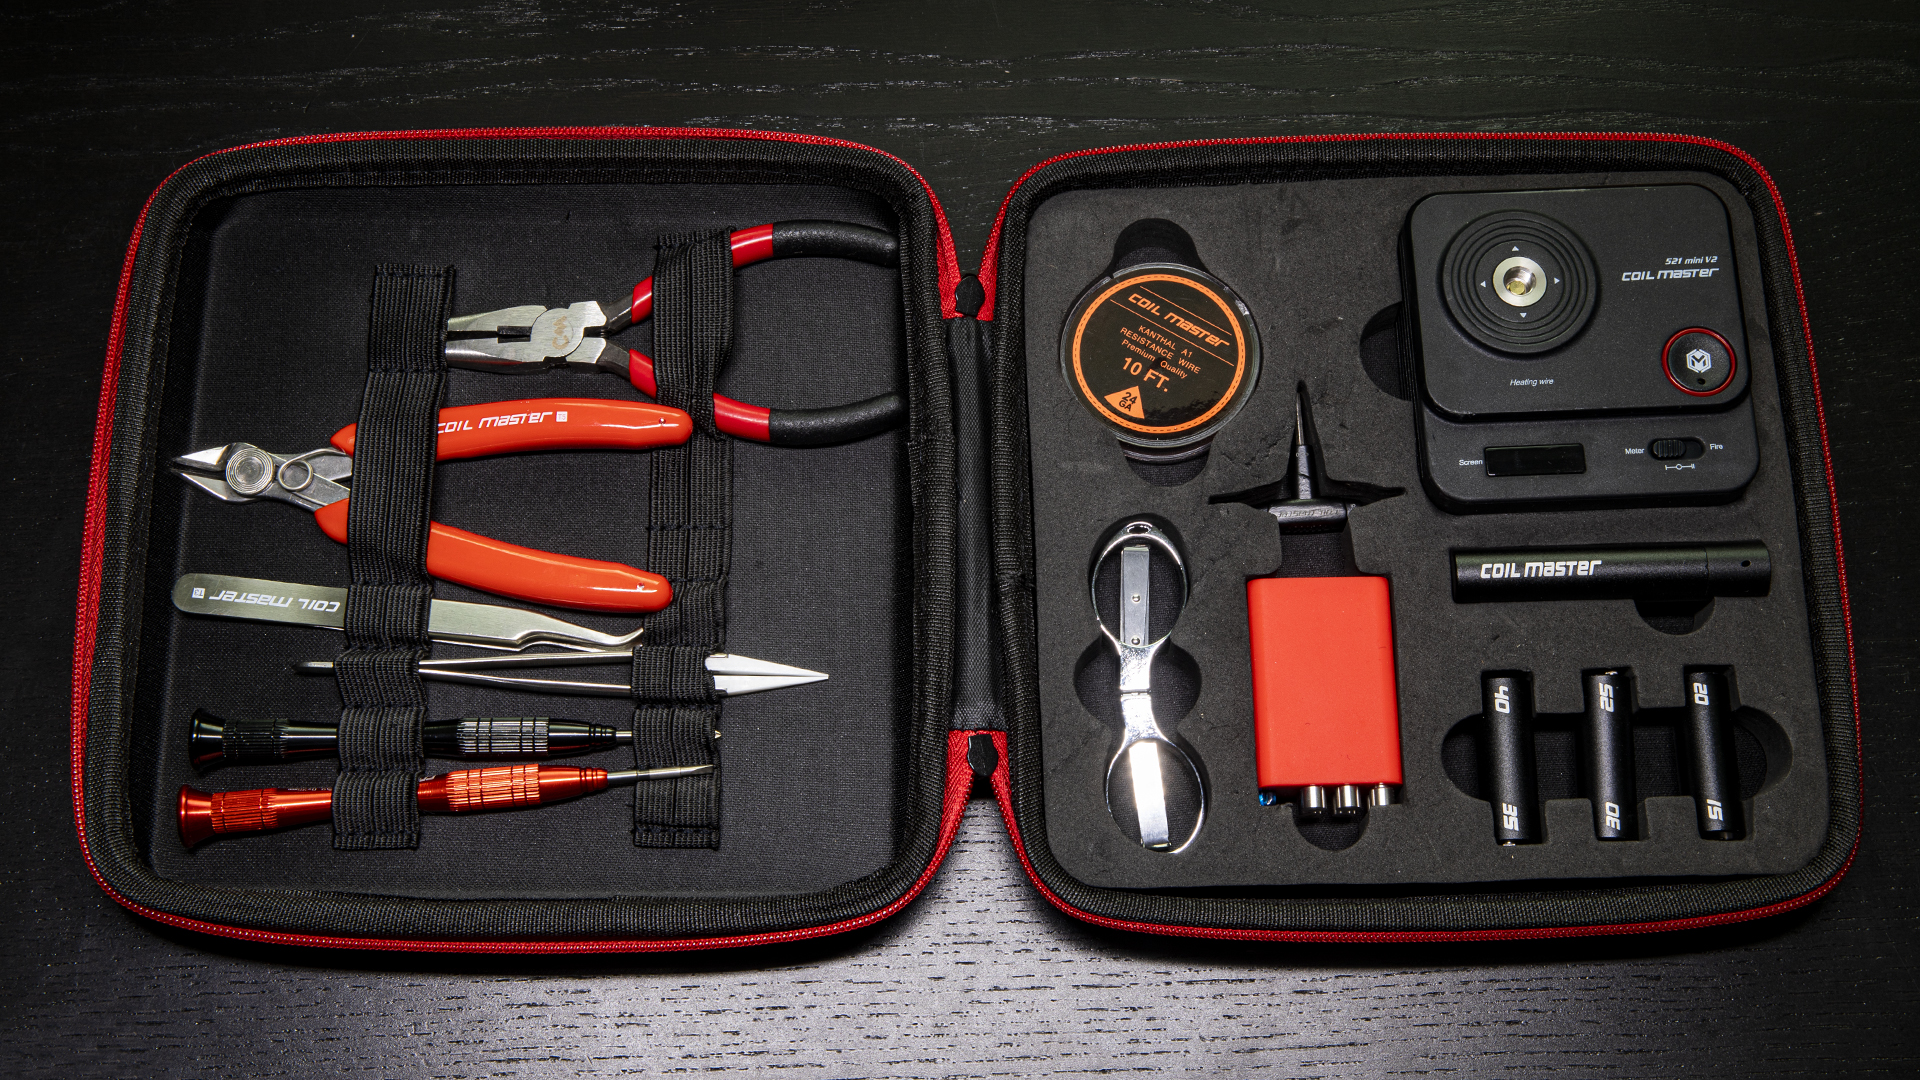
Rebuildable Tools / Building Kits - The convenient thing about getting into building is that many kits are equipped with the majority of rebuildable tools that you need that have been listed above, then one could fill in the gaps as needed. Coil Master is a well-known name in the rebuildable segment of the vaping industry. Bundled into a single simple organized package, the Coil Master DIY Kit V3 comes with everything you need to start building, as well as wire and cotton. It is an ideal starter kit to quickly acquire everything that could be needed.
This isn’t a buying guide, but I would recommend checking forums and product reviews to see what an appropriate choice should be. Every atomizer is different and can be easy for some to build and wick while others find that particular atomizer gives them great difficulty. In general, single coil RDA’s tend to be the easiest to build and much easier to wick, making them a great starting point.
Now that you have acquired the tools that are needed to build, let’s get into the how. We will start with building and installing your coils.
Preparation - For me personally, I suggest taking some time for preparation. Get everything that will be used in front of you. Layout all of the tools, RDA, wire, and cotton, so you have easy access to it all. Wash off your RDA with warm water, dry it off, and screw the RDA base into the meter while turned off. Remove the top cap, and remove the post screws, setting them aside to later affix the coil leads. Now you are ready to build.
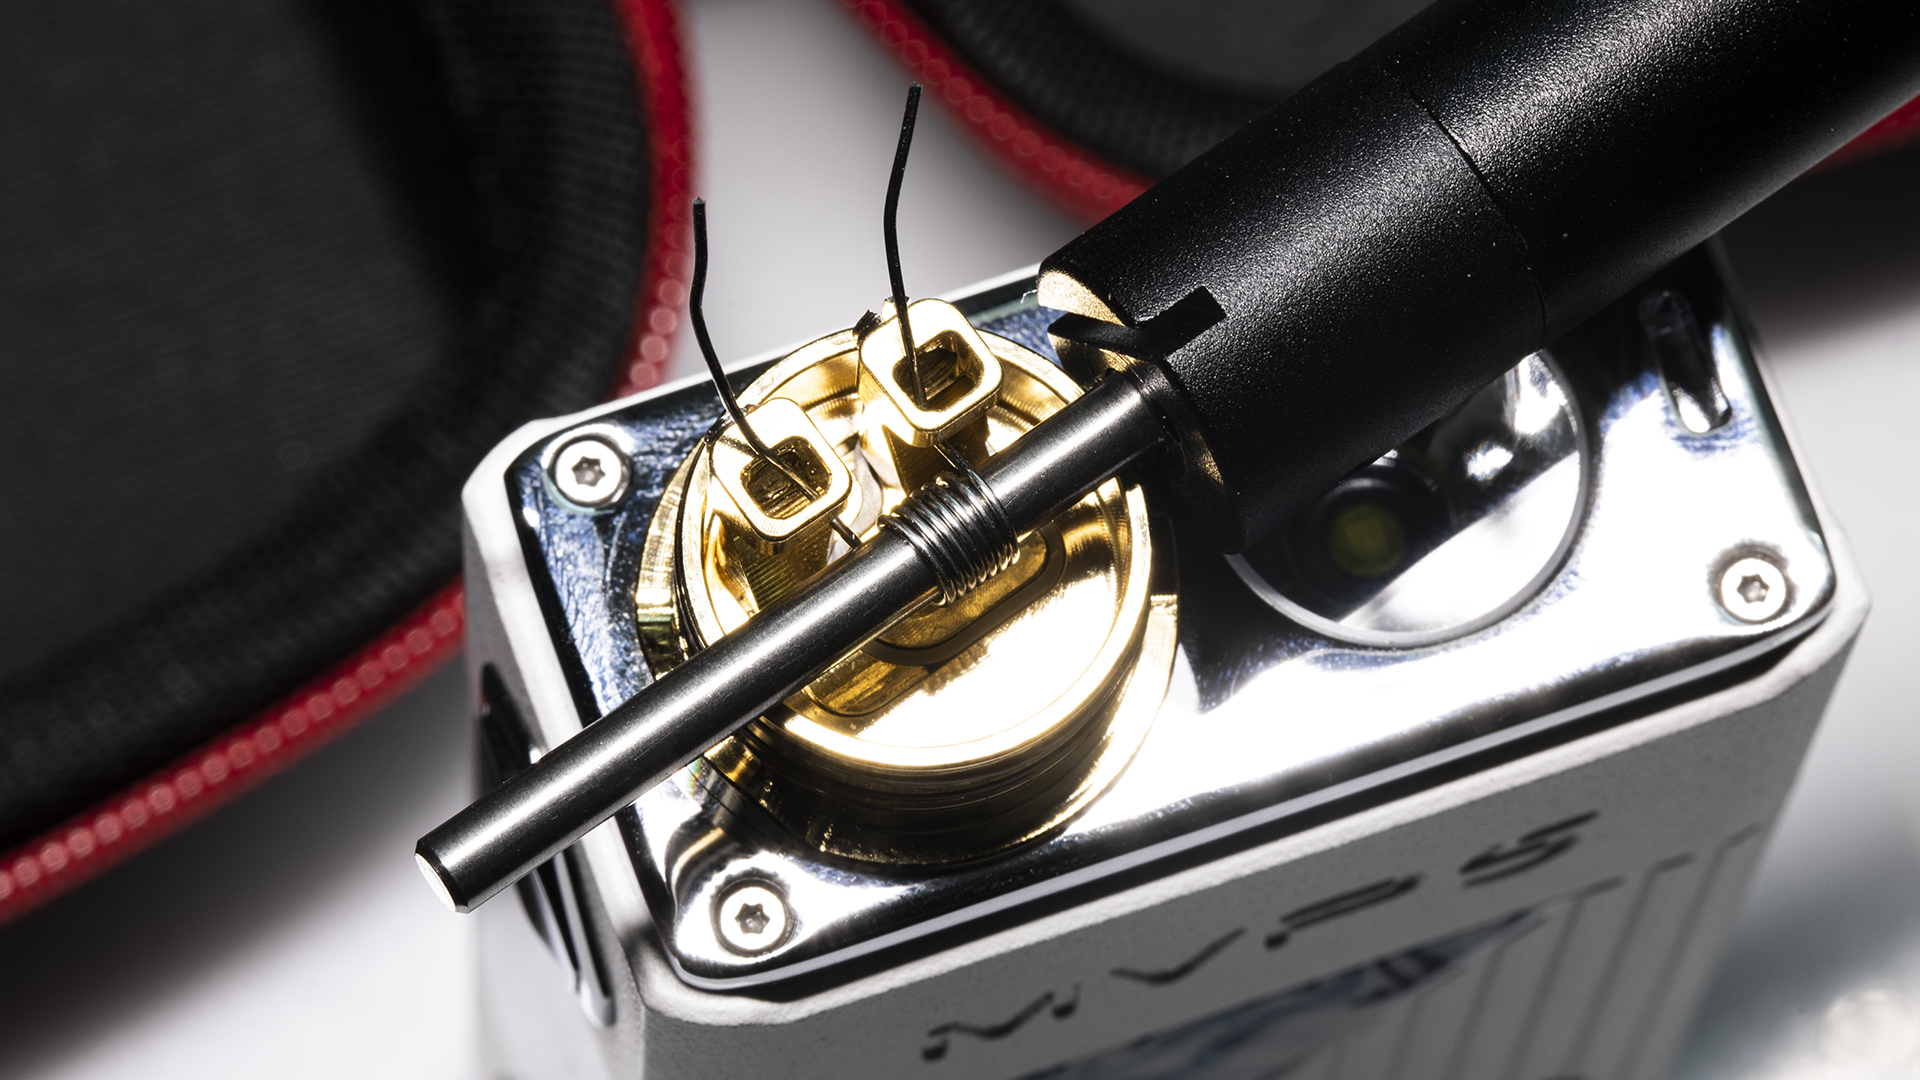
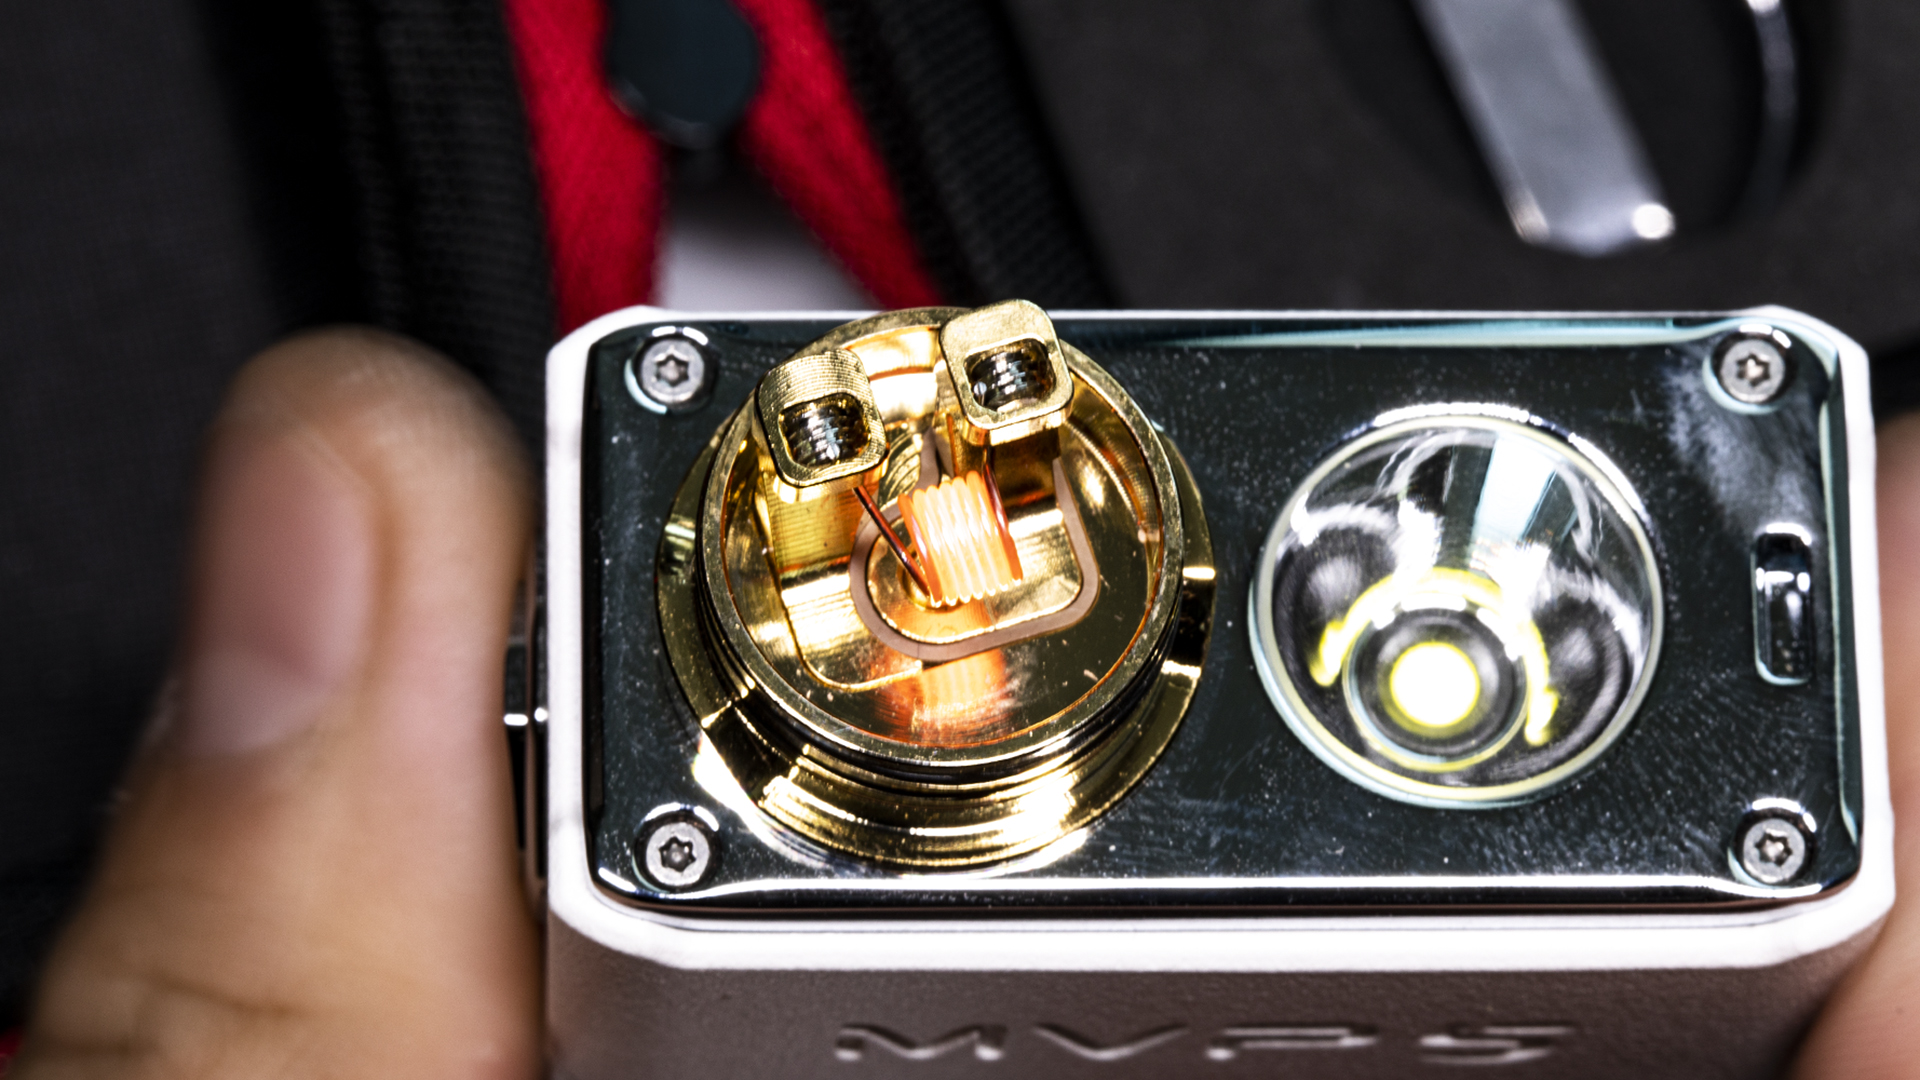
Build Your Coil - The next step is building your coil. A basic coil of 6-7 wraps around a 3mm coil jig is normal and should fit and work in most RDA’s. Begin by cutting off a single wrap of wire from the spool. This should be enough to build with. Assemble the coil jig by unscrewing the top cap and selecting the 3mm rod to fit within, and screwing the cap back on. Take one end of the wire and stick it in the hole of the jig while leaving some extra room coming out of the hole on the other side. Then put the top part on and against the wire, spin it around 6-7 full times. This jig will help make nice even coils. Remove the top part and pull the coil off. Flip it around and use the jig to straighten out the side that was in the hole. Depending on the RDA, your leads should be on either the same side or the opposite. Many single coil RDAs now go on opposite ends, but I suggest watching a video to get a visual example and demonstration

Install your coil - You’ve made your coil, and now it's time to install it. Insert the leads of the wire into the post terminal holes of the RDA. If the leads are too long, feel free to shorten them a little. Leave the coil attached to the rod in the jig to keep the shape of the coil. Screw down the post screws to secure the coil in its place, ensuring a tight and secure connection. Use the wire cutters to trim the excess wire from the outside of each wire lead. Using the bar from the jig, ensure the coil is straight and even, then remove the bar. The coil is now installed.
Remove Hotspots - Next part is to make sure the coil is heating up evenly from the middle to the outside. Turn on your ohm meter to fire the coil and grab your ceramic tweezers. Please note to not do this with full metal tweezers, only ceramic tweezers can touch the coils. If you do not have ceramic tweezers, you must strum the coil in between pulses and not at the same time. Fire the coil until it glows a dim red or orange. This will identify any hotspots, and strumming them in between pulses will make them go away. You could even do this with a metal wire brush or even your screwdrivers.
Cool Down - Congratulations! The coil is now built and installed. Make sure you allow the atomizer and coils to cool down before attempting the wicking step as the coils and base can be very hot. Do not touch it and take a couple minutes break.
Prepare your cotton - Now that its cooled down, it is time to wick. Depending on the type chosen, get your cotton ready. If you chose bagged cotton, all you need to do is to pinch some off. If you choose organic sheets, you’ll have to cut off a strip and peel the top and bottom layers to access the fluffier cotton. As far as amount goes, it is a guessing game that can be adjusted later. Over time, though, you’ll be able to know just how much is needed.
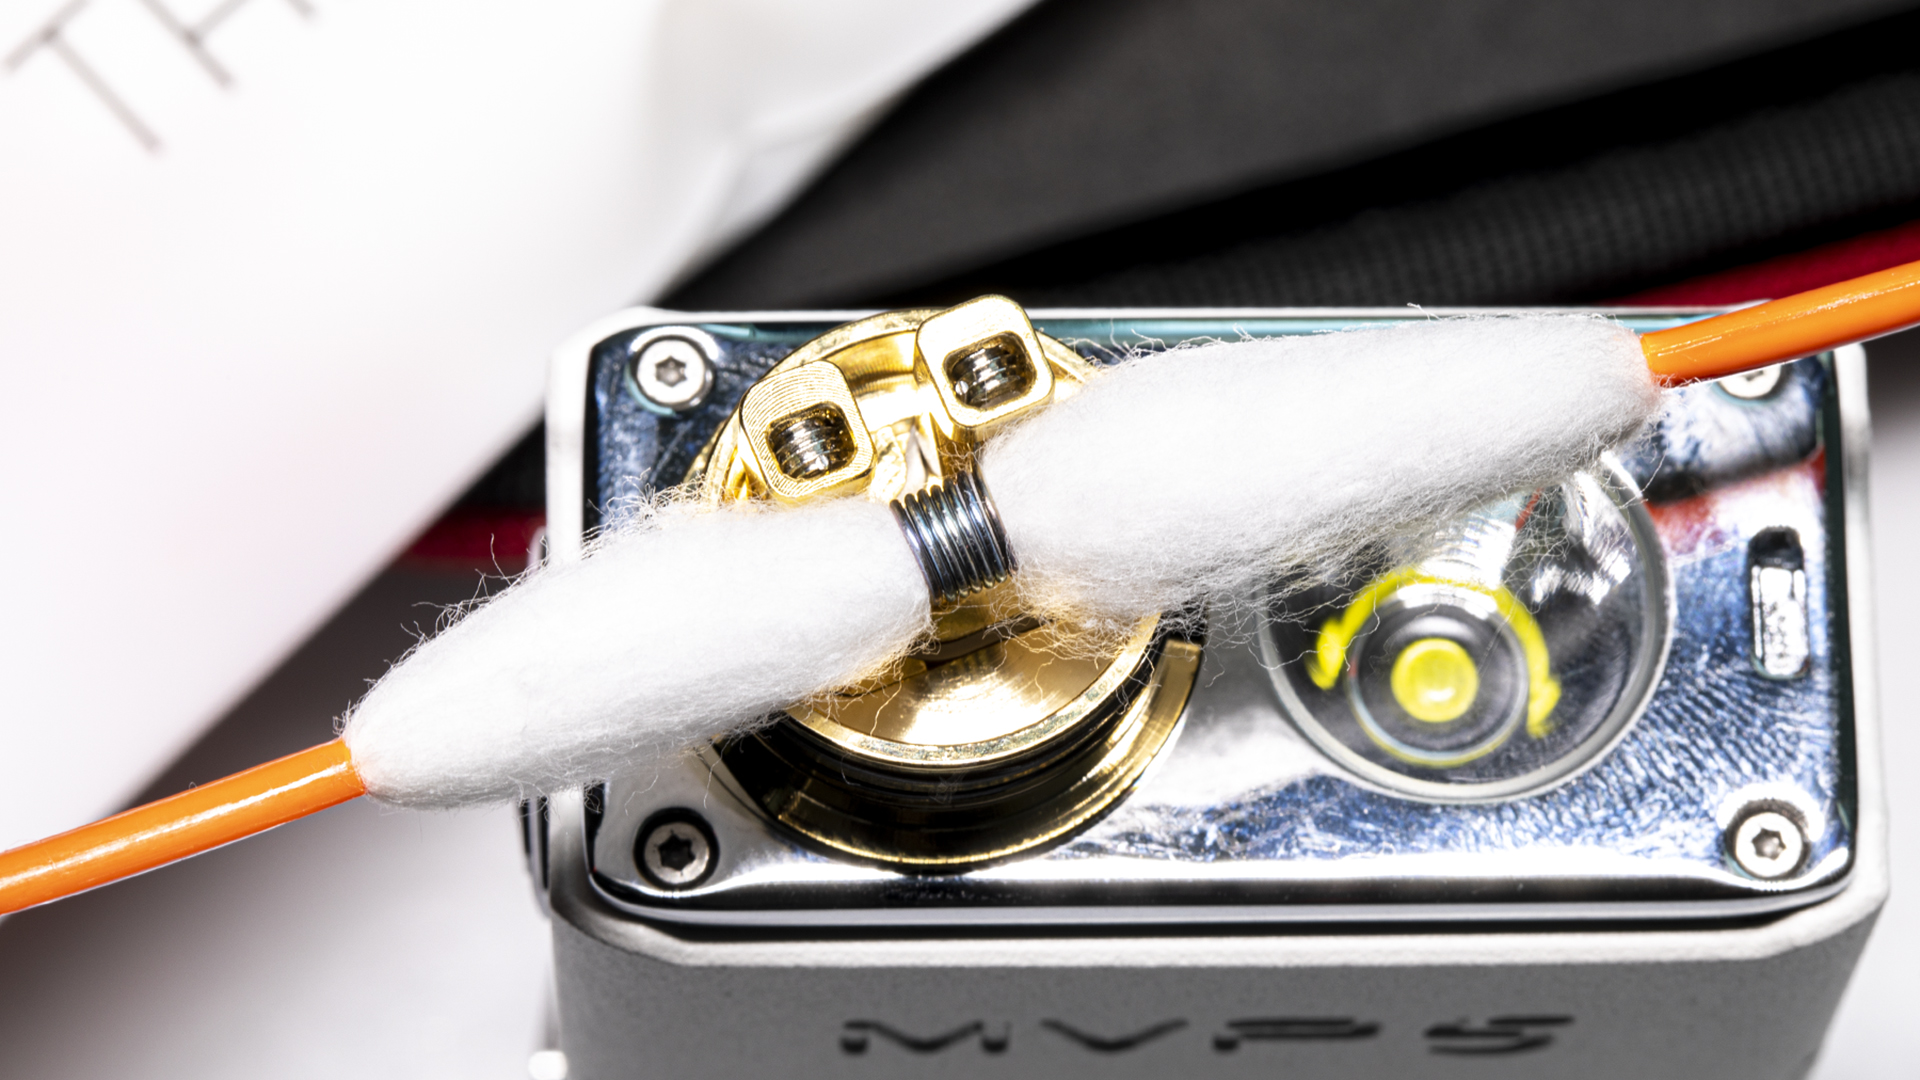
Install your cotton - Take one end of your cotton and roll it up between your fingers so it comes to a point. Run the pointed end through the coil and pull it out the other side. If it does not fit, too much cotton was used and it must be removed to allow the inserted end to pass through resting neatly in the middle.
Floss your coil - Hold both sides of the cotton leads sticking out and “floss” it back and forth to check if its too loose or too tight. Remember cotton expands when wet and if its too tight, it won't be able to absorb any juice.
Fluff and Cut - Now it's time to fluff your cotton. Angled tweezers or regular pointed tweezers work best here. Brush the cotton like you would do to hair, starting from the coil all the way out. This will remove excess cotton while ensuring the cotton is fluffy to absorb juice. After that, cut the cotton ends so they can easily fit within the RDA, ensuring they go all the way to the deck. Having a little extra on the bottom of the deck is ideal to absorb any eJuice that is over-dripped or over-squonked. In addition, it makes it easy to just drip down the middle of most RDAs as the juice will work its way up via capillary effect.
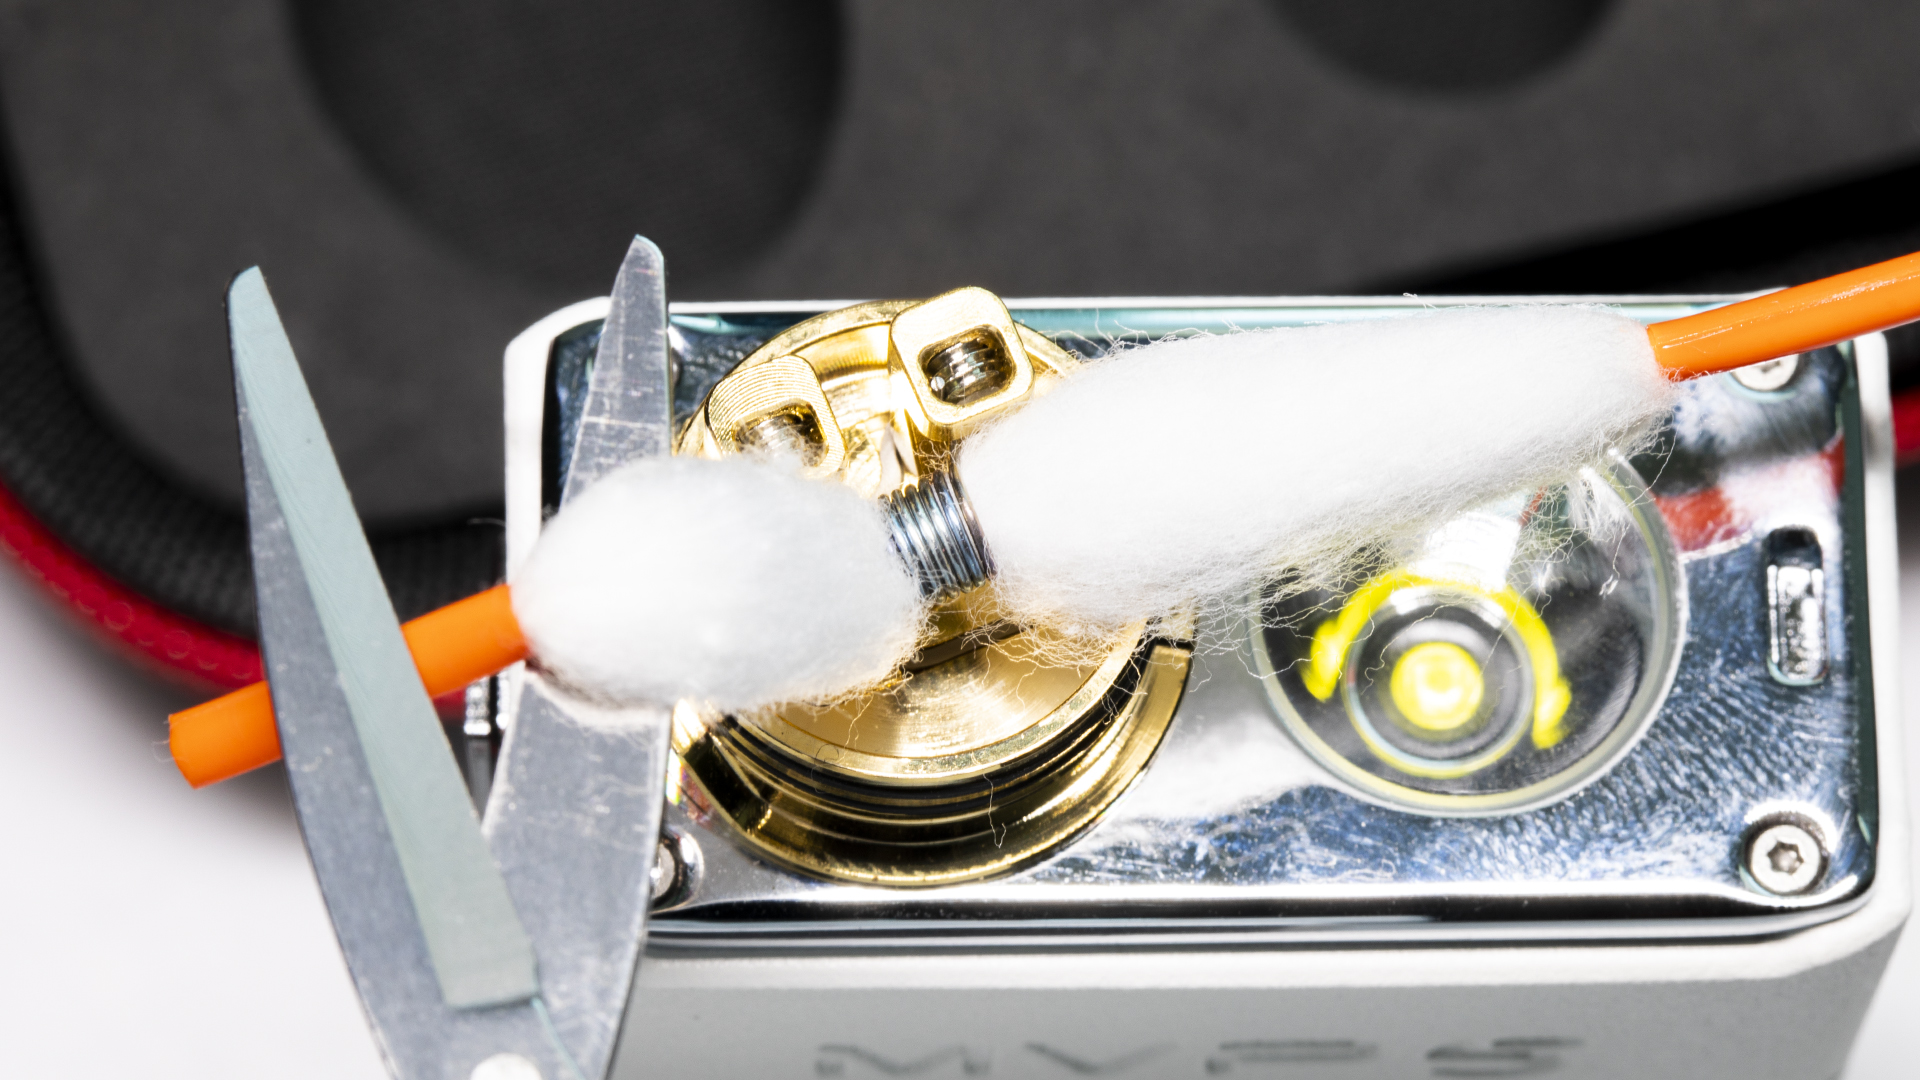
Tuck the ends in! - Almost there! The final step to building, utilize angled tweezers to grab the ends of the cotton and lift it up and place it in the RDA. Do not jam and pack the cotton in as it can affect wicking. Instead just lift and place it to maintain the fluffiness.
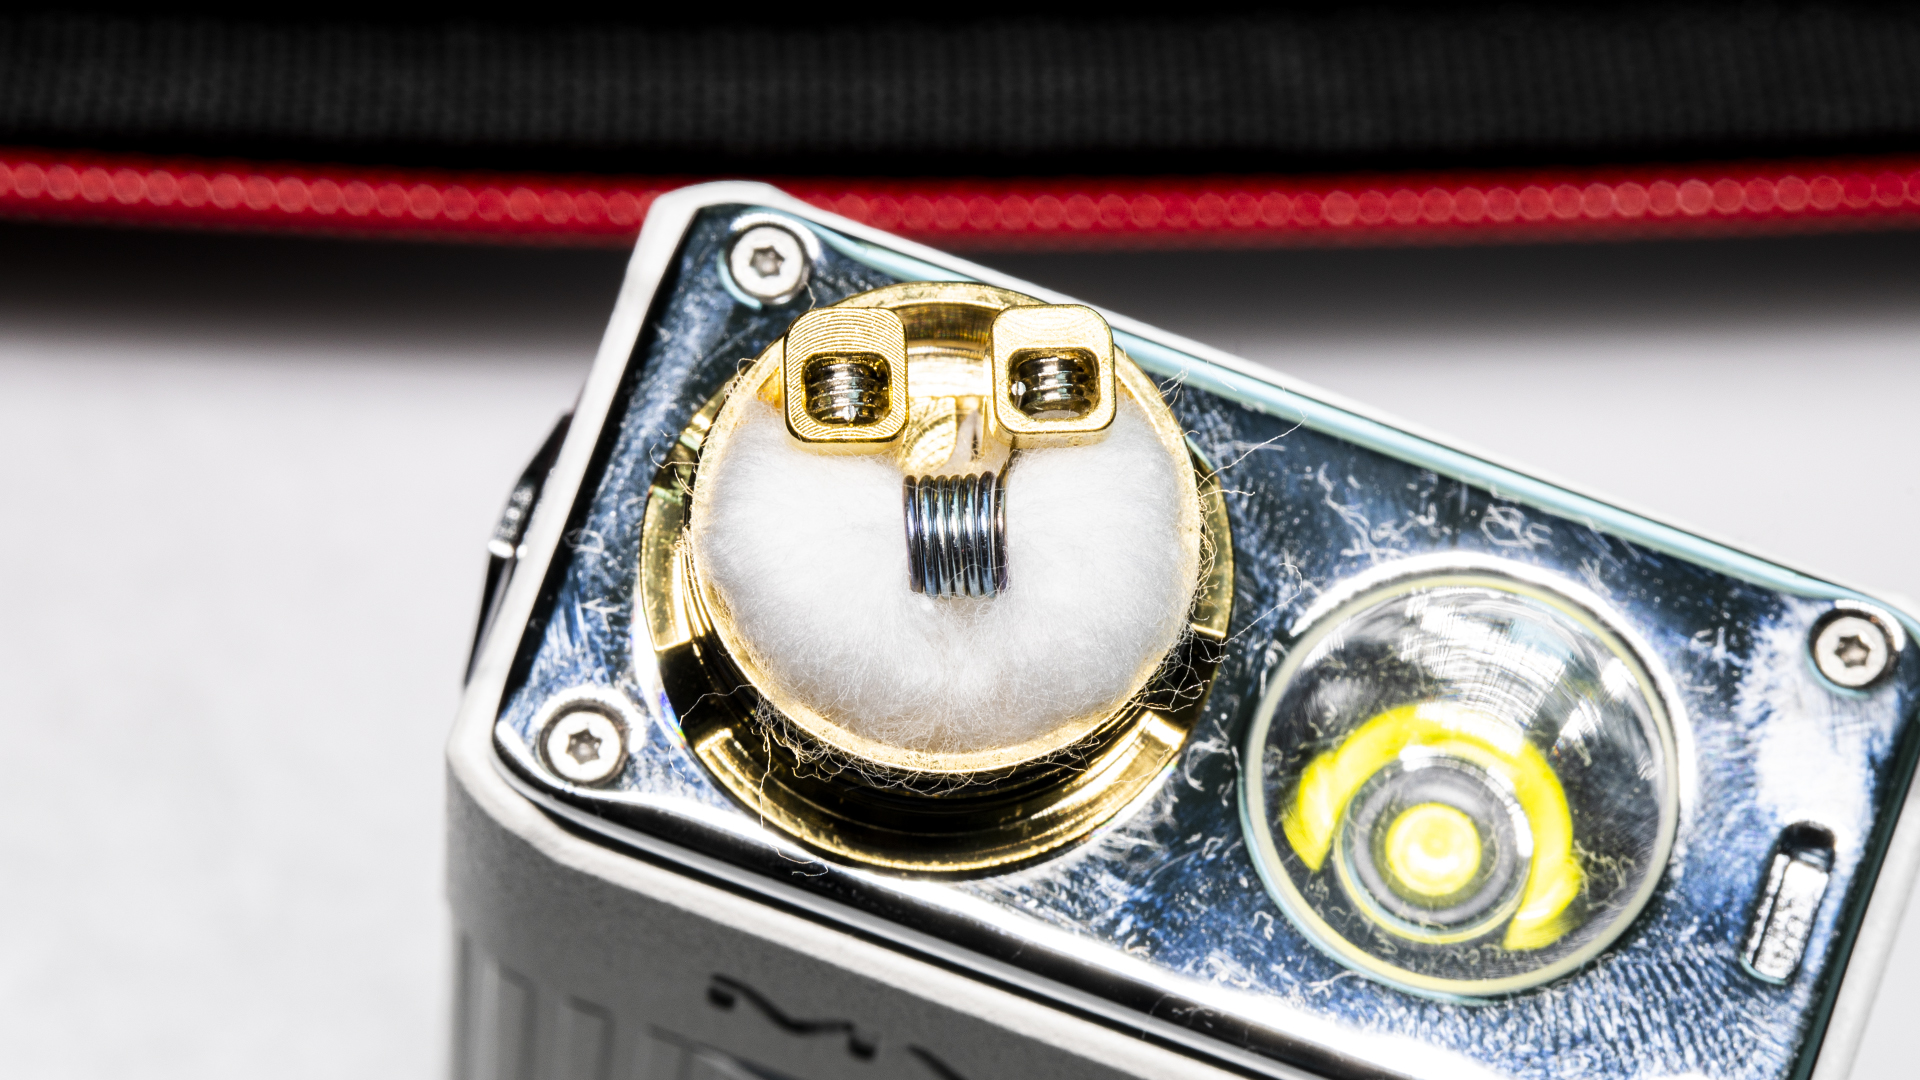
Juice it Up - To fully reap the benefits of rebuildables, it's time to drip some juice on the cotton until its fully saturated. Make sure the cotton is covered in juice. Using a juice that is not fully clear will help in ensuring the cotton is wicked. Once it is all juiced up you are ready to vape. Put it in your mod and give it a try.
That concludes a beginner’s guide to building. Now that you have the basics down, feel free to experiment and customize your vape to how you like it with the selection of wire options and gauges available.
0 Comment
